SSO example with Microsoft Entra ID
To use SSO with OpenID Connect we have a strategy li-authentication-openid-connect to use in the auth.connections config. With this strategy, you can use a SSO Service (Microsoft Entra ID, Google, Facebook, …) which supports the OpenID Connect for authentication.
To enable Microsoft Entra ID SSO for Livingdocs, add the config below to the server config in auth.connections. It creates a setup for SSO with Microsoft Entra ID and shows the button for that on the login page. It is also using the existing user from Livingdocs and create a Microsoft Entra ID Identity. The already written articles with this user will still be assigned to the same user. The match of the user is done with the email address.
const {nanoid} = require('nanoid')
const azureConfig = JSON.parse(process.env.auth_azure || '{}')

module.exports = {
  auth: {
    accessTokenTtl: '10h',
    sessionTtl: '20h',
    connections: {
      local: {
        label: 'Password',
        enabled: true,
        loginEnabled: true,
        registrationEnabled: false,
        strategy: 'li-authentication-local'
      },
      azure: {
        strategy: 'li-authentication-openid-connect',
        enabled: azureConfig.enabled || false,
        loginEnabled: true,
        registrationEnabled: false,
        autoRegistrationEnabled: false,
        connectionId: 'azure',
        // Microsoft Entra ID Issuer, replace the tenant with your tenant id
        // example for google: https://accounts.google.com/.well-known/openid-configuration
        issuer: 'https://login.microsoftonline.com/{tenant}/v2.0/.well-known/openid-configuration',
        config: {
          clientId: azureConfig.clientId,
          clientSecret: azureConfig.clientSecret,
          // Check `Configuring OpenID in Microsoft Entra ID` section for a guide
          scope: 'openid email profile',
          async extractClaims({tokenSet}) {
            const claims = tokenSet.claims()
            // assert group here
            await transferLocalIdentityToAzure(claims)
            return claims
          },
          // set the access to projects with specific groups
          // on the basis of the claims. This is used for new users
          // which are not registered locally
          // claims is a openid-connect standard claim, for available properties see:
          // https://openid.net/specs/openid-connect-core-1_0.html#StandardClaims
          async extractProjects({client, tokenSet, claims}) {
            // return a default
            return [
              {
                projectHandle: 'daily-planet',
                groupLabels: ['owners', 'editors']
              },
              {
                projectHandle: 'service',
                groupLabels: ['owners', 'editors']
              }
            ]
          }
        },
        ui: {
          label: 'Microsoft Login',
          icon: 'microsoft-azure'
        }
      }
    }
  }
}

let db
// create a new AzureAD identity for the existing user
async function transferLocalIdentityToAzure(claims) {
  if (!db) db = require('../../app/server').db

  const [exists] = await db.sql`
    SELECT * FROM authentication_provider_identities
    WHERE connection_id = 'azure'
    AND identity_id = ${claims.sub}
  `
  // Return if the AzureAD identity is already existing
  if (exists) return

  const [legacy] = await db.sql`
    SELECT * FROM authentication_provider_identities
    WHERE connection_id = 'local'
    AND identity_id = ${claims.email.toLowerCase()}
  `

  // return if there is no existing local identity
  if (!legacy) return

  // change the existing local identity to a AzureAD identity
  await db.sql`
    INSERT INTO authentication_provider_identities (
      id,
      connection_id,
      identity_id,
      identity_data,
      user_id
    )
    VALUES (
      ${nanoid(12)},
      'azure',
      ${claims.sub},
      ${{email: claims.email, name: claims.name}},
      ${legacy.user_id}
    )
  `
}
Configuring OpenID Connect in Microsoft Entra ID
To configure OpenID in Azure Active Directory, you have to go follow the steps depicted below.
Open the Azure Portal and go to Azure Active Directory, via search bar or on the service list.

On the left sidebar, click on
App registrations. Then create a new registration with+ New registrationbutton.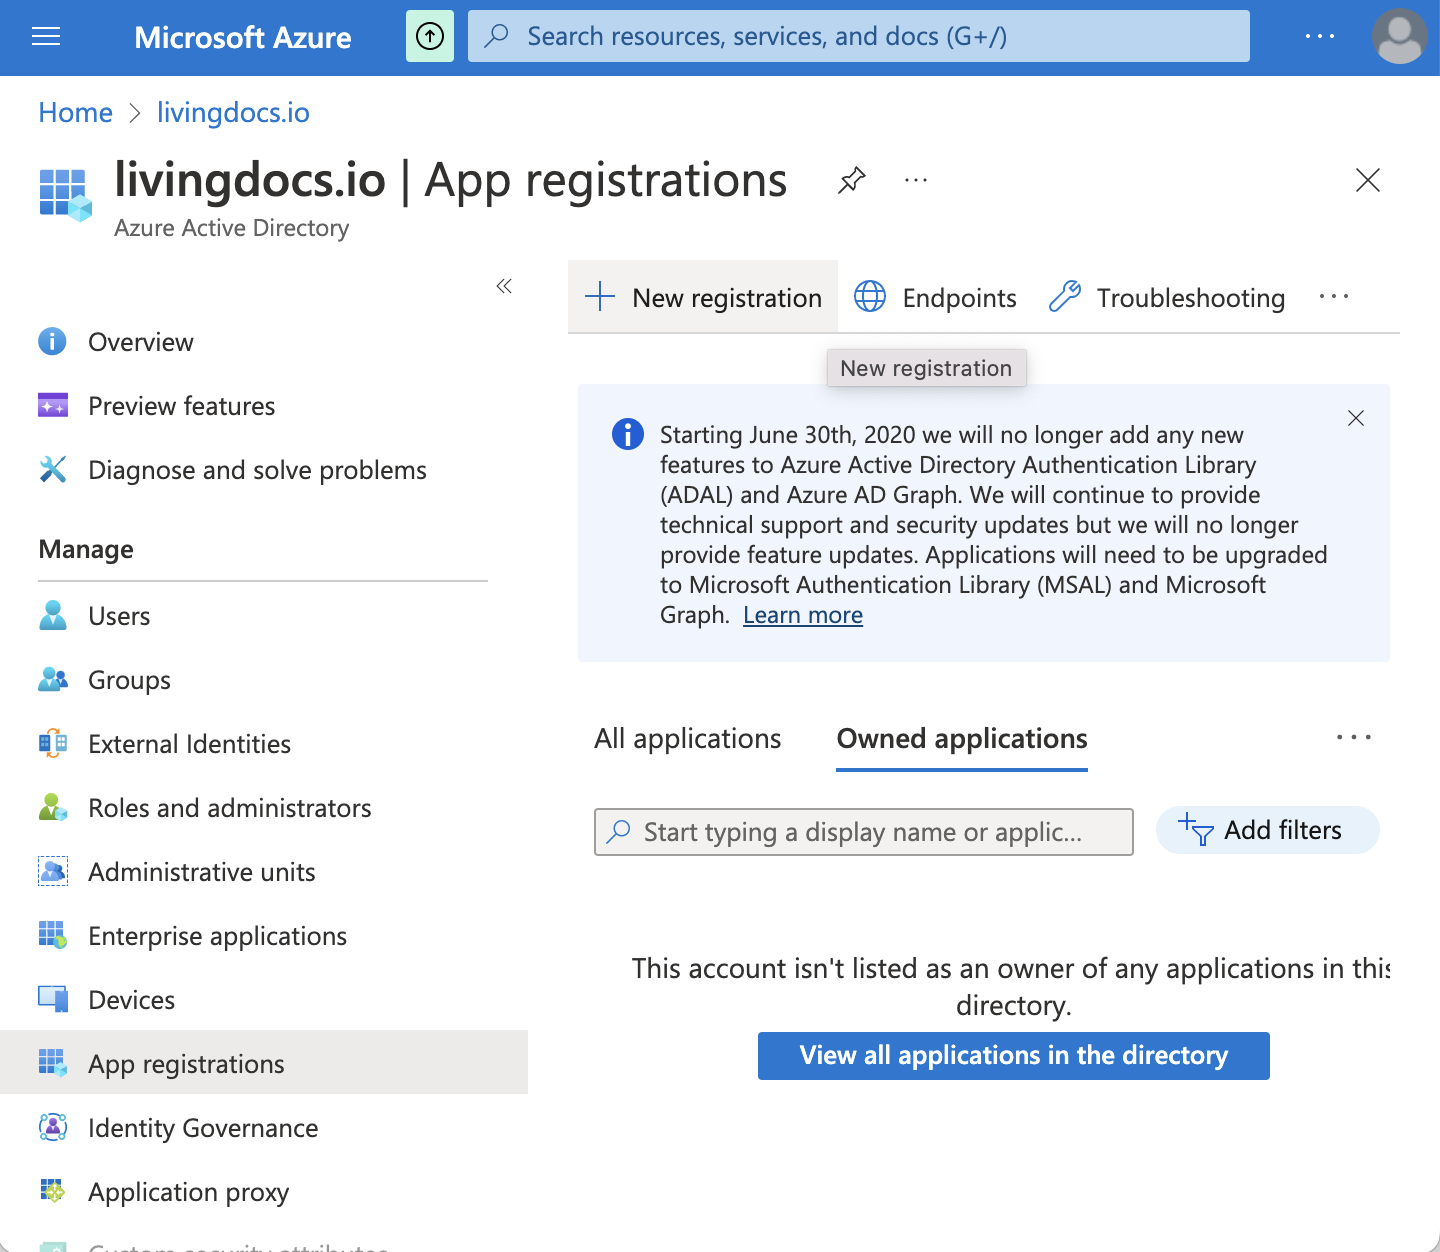
Define a name for the application and choose the access depending on your requirements (default:
Single tenant). In the redirect URI group, specifyWebin platform drop down and your redirect URI should look likehttps://<my-domain-name>/proxy/api/auth/azure/callback. Finally, clickRegisterto create the registration.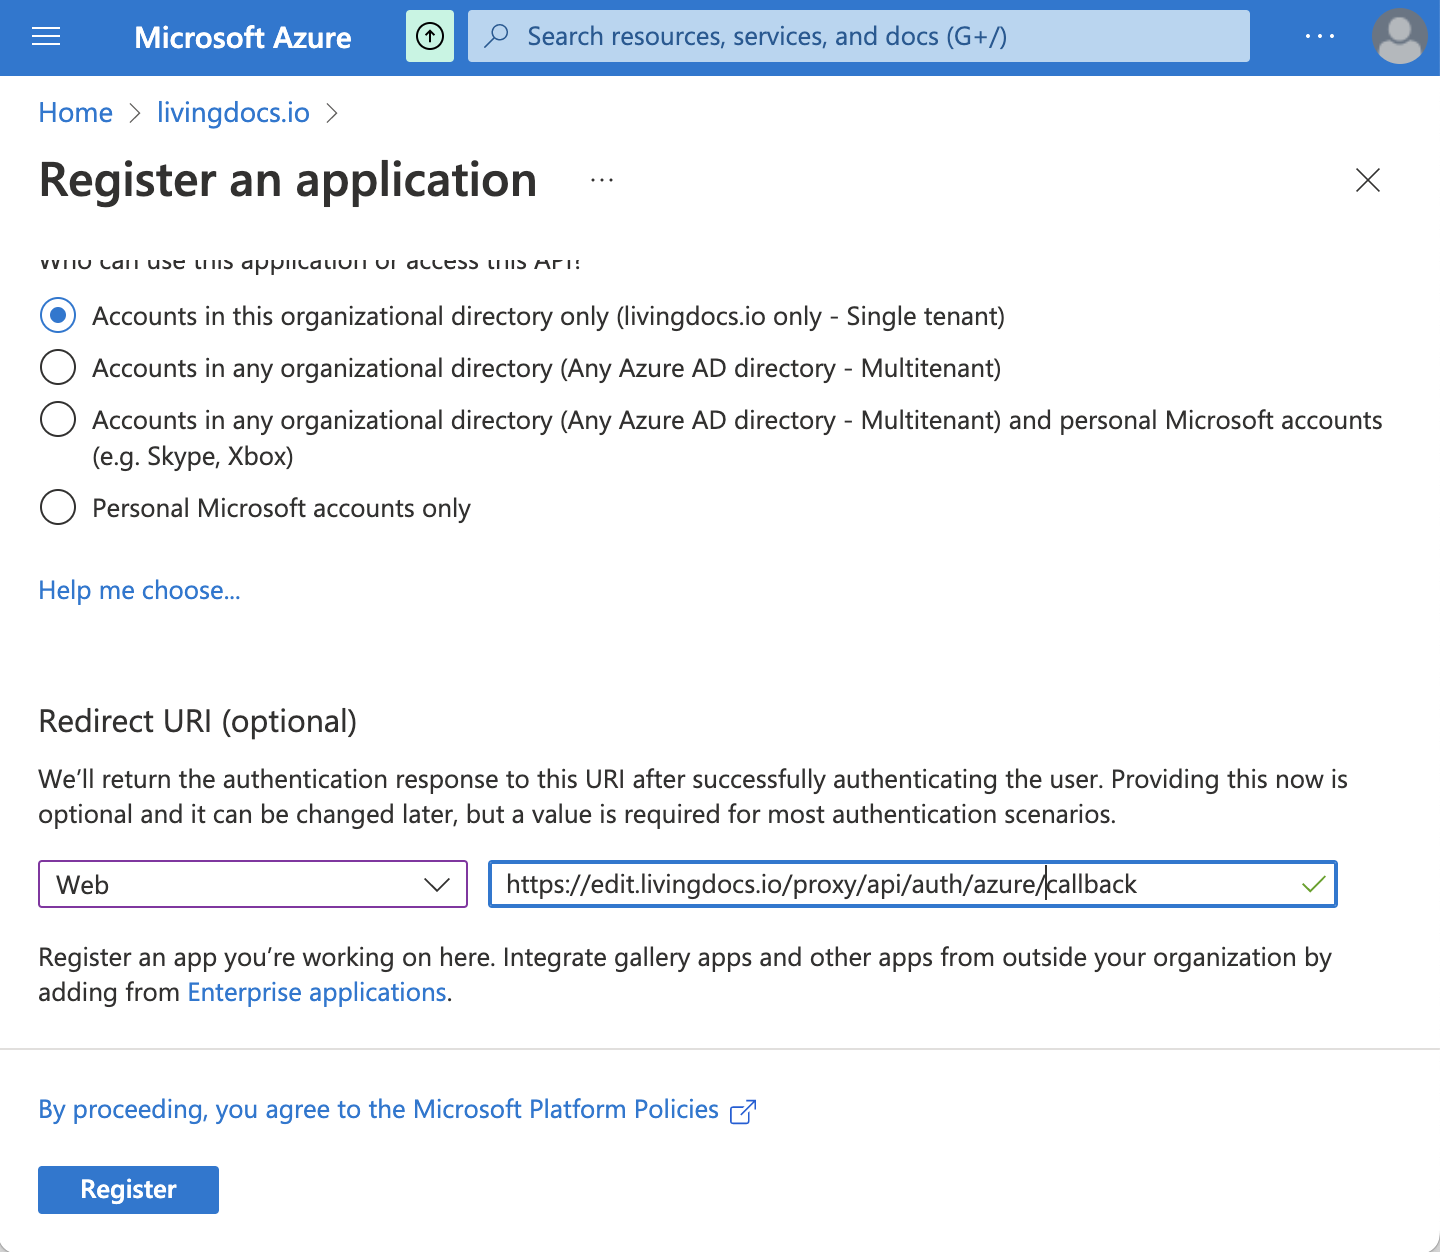
In the registration view left sidebar, go to
Authenticationmenu. EnableAccess tokens (used for implicit flows)andID tokens (used for implicit and hybrid flows), then save.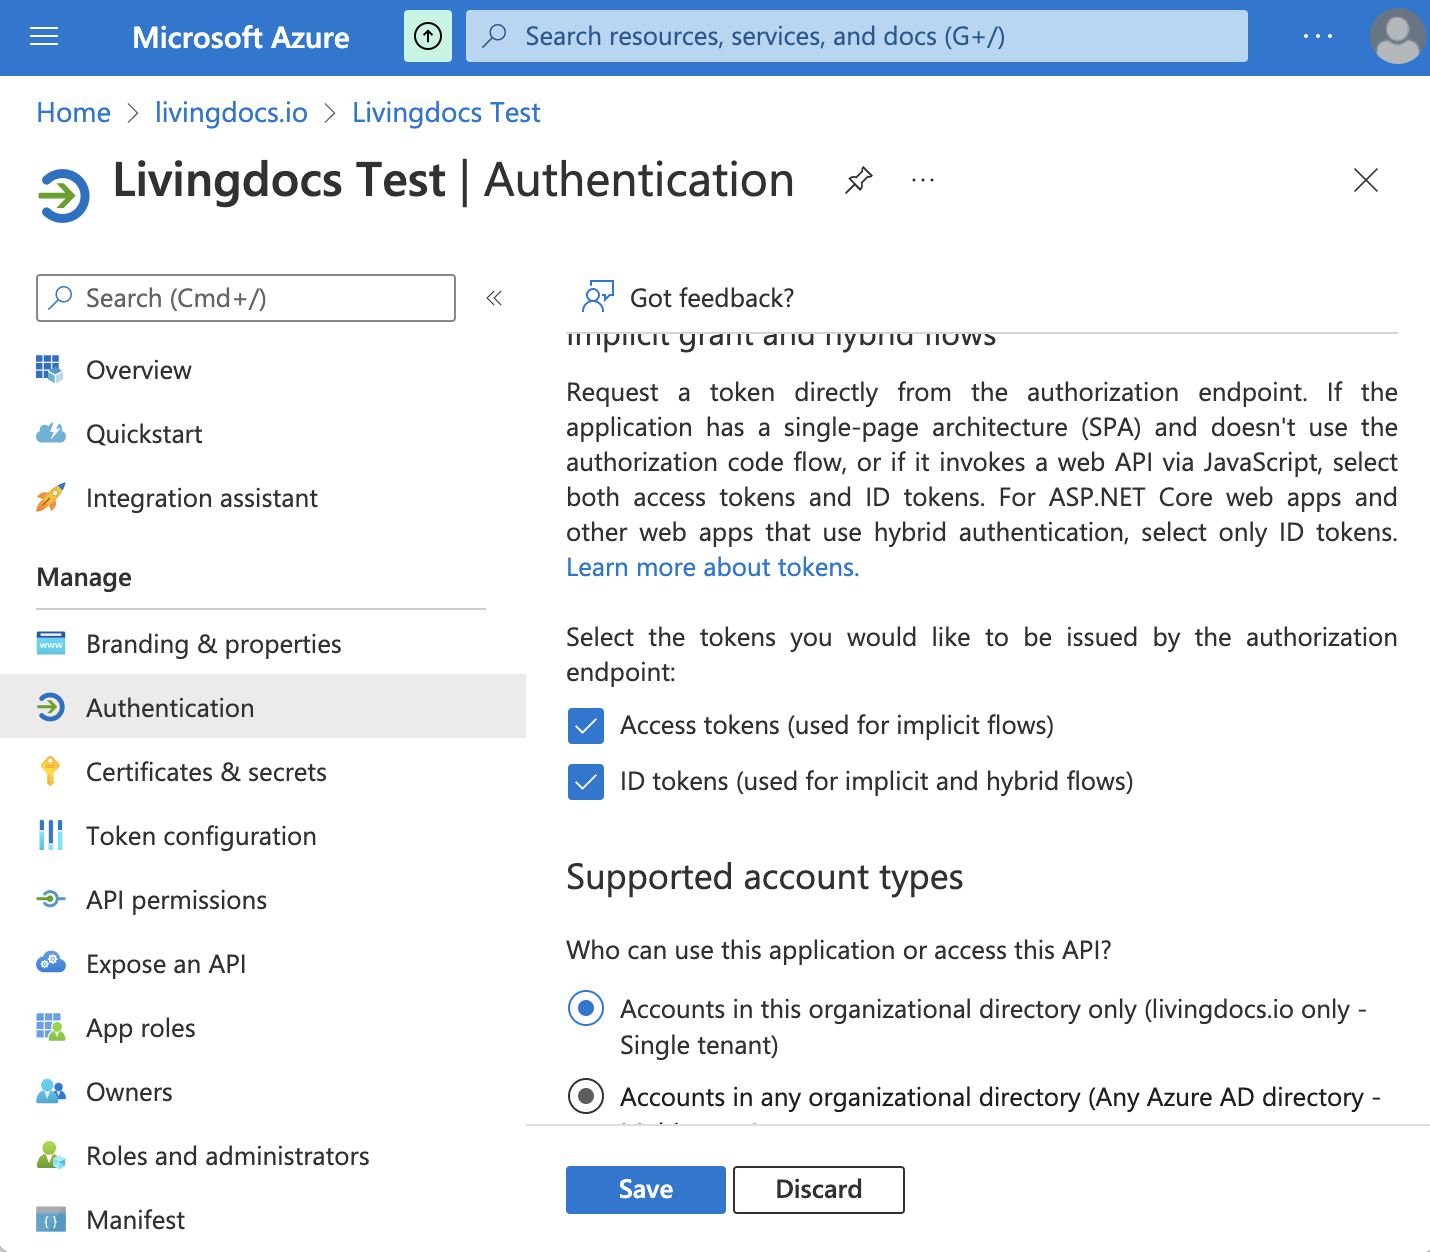
In the registration view left sidebar, go to
Certificates & secretsmenu. Add a client secret with+ New client secret, add a description to identify the secret and expiration date. FinallyAddthe client secret.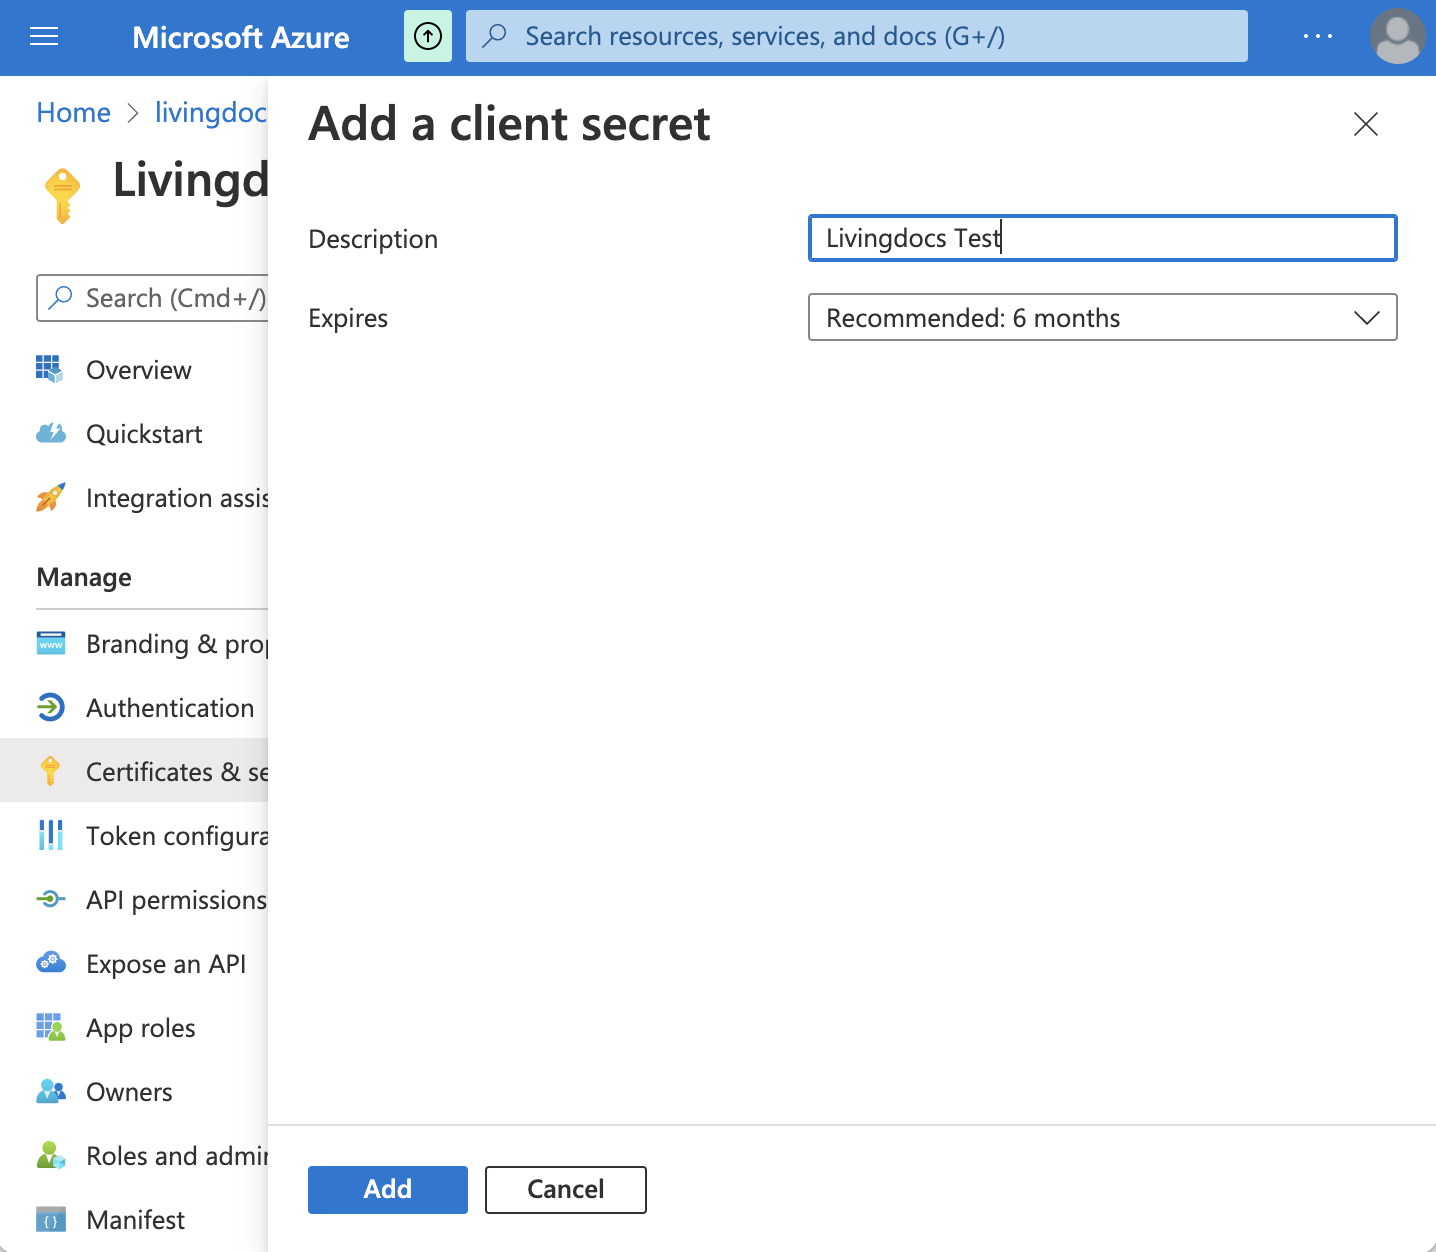
In the list of client secrets copy the newly created secret ID to use in Livingdocs Server configuration
clientSecretparameter.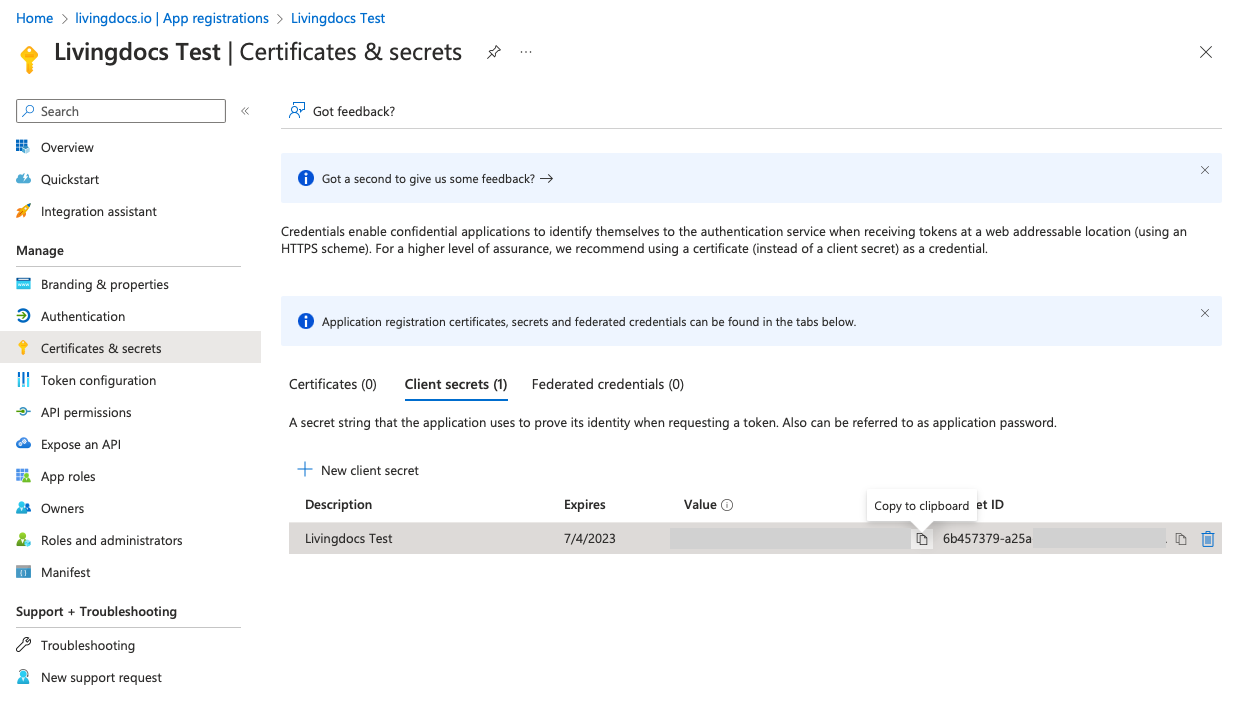
Create roles in the
App rolessection to assign users/groups to the app. Click on+ Create app rolebutton to create a new role. Define a name, value and description for the role. InAllowed member types, chooseUsers/Groupsto assign users or groups to this role. Finally, clickApplyto create the role.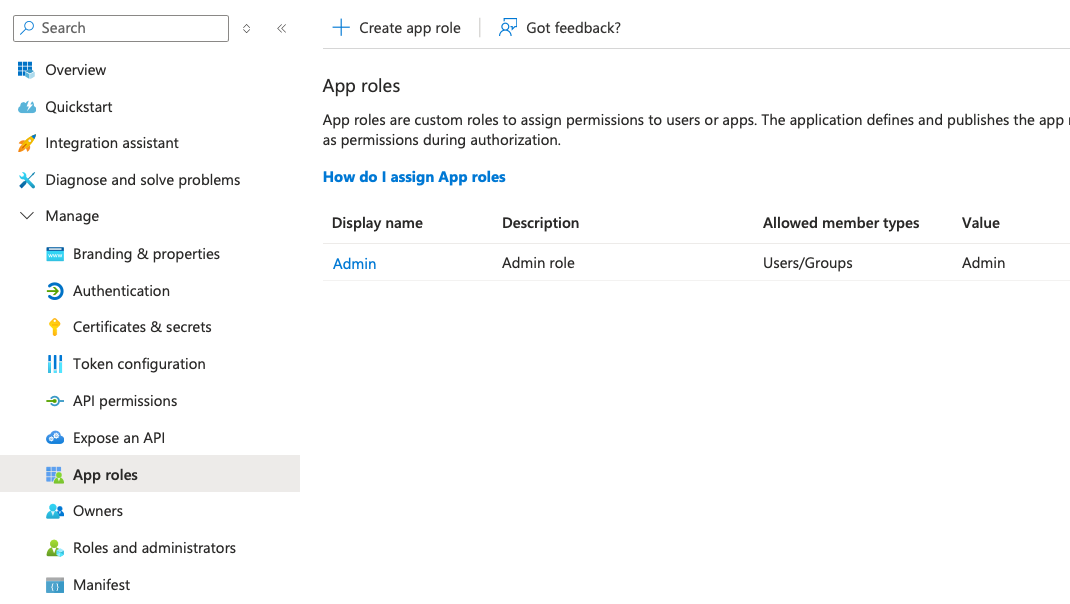
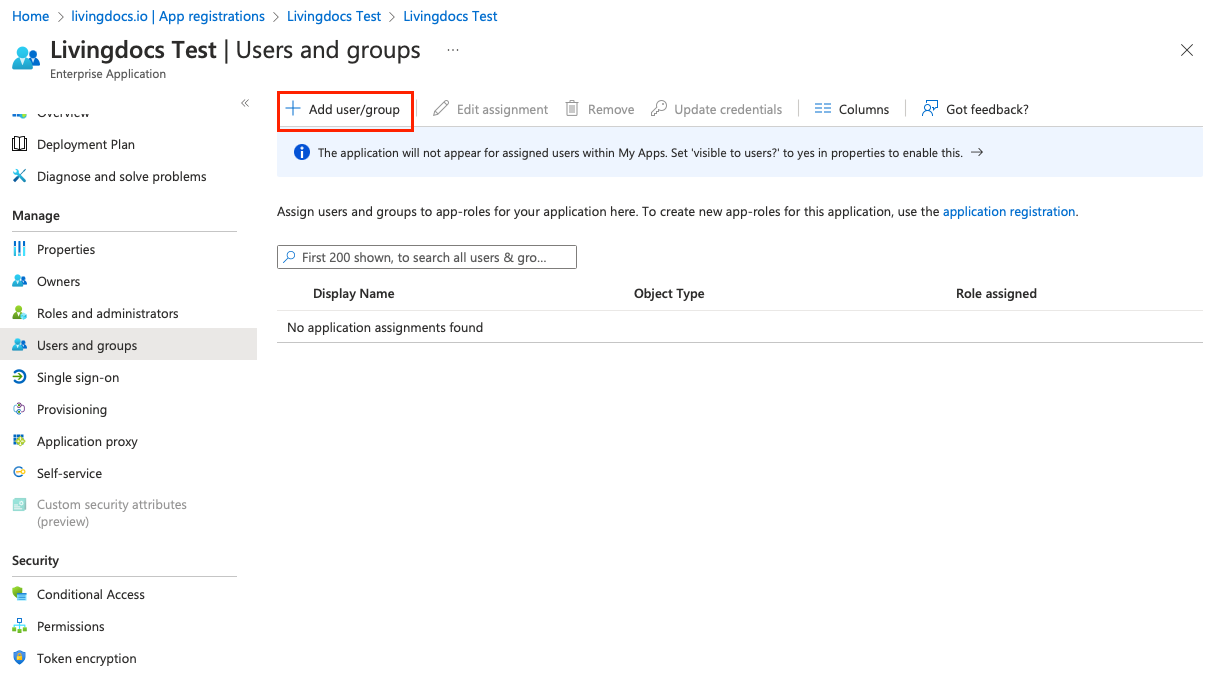
To add users or groups to the app registration go to
Configure your organization.
Go to
Users and groupson the sidebar. You should see+ Add user/groupto add the users that need access to the app.