The oEmbed include service (li-oembed-service) allows users to embed content (such as photos, videos, or iframes) by providing a link to a resource, without having to worry about embed scripts. The include service has a small number of core providers, but it can easily be extended with additional providers, or with a generic catch-all provider.
Core oEmbed Providers
- Bluesky (
li-bluesky), Added in:release-2025-05 - Dailymotion (
li-dailymotion) - Datawrapper (
li-datawrapper) - Facebook (
li-facebook-post), ATTENTION: requires credentials - Instagram (
li-instagram), ATTENTION: requires credentials - Pinterest (
li-pinterest), Added in:release-2025-05 - Podigee (
li-podigee) - Reddit (
li-reddit), Added in:release-2025-05 - Spotify (
li-spotify) - TikTok (
li-tiktok) - Twitter (
li-twitter) - Vimeo (
li-vimeo) - YouTube (
li-youtube)
A note on Facebook and Instagram: Meta is not allowing public access to oEmbed endpoints. You need to provide credentials of a valid Facebook App in order for this to work. In addition your Facebook app also needs to undergo a review process for the Oembed Read permissions. See below for more information.
Server Configuration
The oEmbed feature must be enabled within the server config with the oembed.enabled property (default: false). The maximum HTML response length from an oEmbed API can be defined using maxEmbedSize, which will limit the size of an embed string (default: 102400 characters). It’s also possible to select the core providers you want to enable, or disabled them completely by setting allowedCoreProviders to an empty array. By default all core providers will be enabled.
// <environment>.js
{
  // ...
  oembed: {
    // Enables the API, editor route, and include service (default: false)
    enabled: true,
    // Maximum HTML response length from oEmbed API (default: 102400)
    maxEmbedSize: 1024 * 1024,
    // Specify the enabled core providers by provider handle (default: undefined)
    allowedCoreProviders: [{name: 'li-youtube'}],
  },
  // ...
}
Add Custom Providers
The oEmbed providers can be extended with any custom providers you wish to implement. When trying to find the correct provider for the request the core providers will be checked first, and then the custom providers will be checked in the order they were registered.
For an idea of websites which support oEmbed you can take a look at the oEmbed providers.json file. If you want to support as many websites as possible then it would be possible to create a generic catch-all provider which parses website data to find discoverable providers.
Provider Registration
During server initialization the oEmbed providers used by all projects need to be registered.
// app/server.js
liServer.registerInitializedHook(() => {
  liServer.registerOembedProviders(oembedProviders)
})
The parameter passed to the registerOembedProviders() function must be an array of provider objects.
// providers.js
module.exports = [require('./soundcloud'), require('./twitter')]
Simple Provider
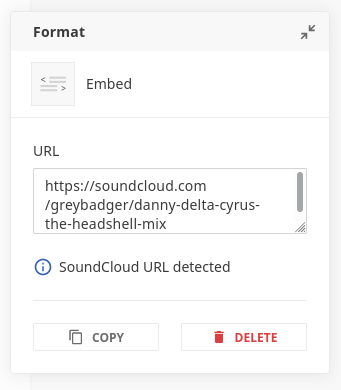
As oEmbed providers must return a standardised response payload it is possible to configure a simple provider using only a few string values. In this example, when a user pastes a URL into the oEmbed form it will be parsed, and then the hostname will be compared with the hostname string from the provider config. If the strings are equal then a request will be sent to the oembedApiUrl with the user input URL as a query parameter. The provider should then return the embed HTML with a JSON response (XML is not supported without additonal configuration).
// soundcloud.js
module.exports = {
  handle: 'soundcloud',
  providerName: 'soundcloud',
  providerLabel: 'SoundCloud',
  hostname: 'soundcloud.com',
  oembedApiUrl: 'https://soundcloud.com/oembed?format=json'
}
Advanced Provider
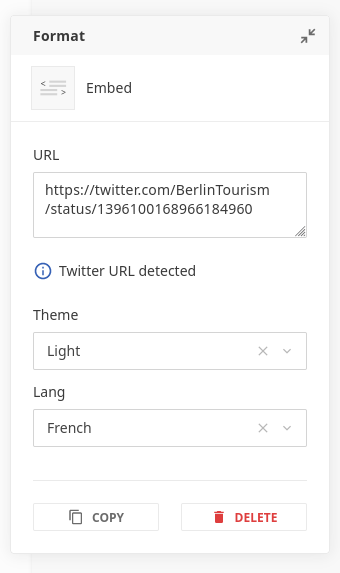
A more complex oEmbed provider can extend the simple configuration above with some additional properties.
Firstly, it’s possible to use a regular expression for the hostname comparison to support multiple subdomains and top-level domains with a single provider. It would also be possible to create a catch-all provider this way.
A uiParamsSchema array of metadata plugins can also be provided which enables you to generate a form for the user to customise the embed. Default values for the form can optionally be set using the defaultParams object, with the object keys matching the metadata plugin handle, and the property value being set as a valid value for the plugin.
There are two hooks which can be set: prepareRequest and parseResponse.
The prepareRequest hook receives an object containing the url which the user pasted into the form, along with any properties set using the uiParamsSchema form. The hook should return an object which contains a params property. The property’s value should be an object which contains keys and values that will be sent to the oEmbed provider’s API endpoint as query parameters. To support multiple endpoints within a single provider it is also possible to return a url instead of defining oembedApiUrl for the provider. This property should be a sibling of params, and should not be confused with the url property inside the params object. The top-level url is the API endpoint to query, and params.url is the resource to be embedded.
The parseResponse hook receives the response body from the oEmbed API. It must return an object containing a html property with a HTML string value. This hook can be used to parse an XML response if JSON is not supported by the API. It could also be used to manipulate content within the HTML, or wrap the HTML inside a container element. The HTML returned by this hook will replace the inner HTML of the include directive in your component.
// twitter.js
module.exports = {
  handle: 'twitter',
  providerName: 'twitter',
  providerLabel: 'Twitter',
  hostname: /^(www\.)?twitter\.com$/,
  defaultParams: {
    theme: 'dark',
    lang: 'de'
  },
  uiParamsSchema: [
    {
      handle: 'theme',
      type: 'li-enum',
      config: {
        dataProvider: {
          handle: 'li-oembed-twitter-theme',
          type: 'labelValuePair',
          items: [
            {label: 'Light', value: ''},
            {label: 'Dark', value: 'dark'}
          ]
        }
      }
    },
    {
      handle: 'lang',
      type: 'li-enum',
      config: {
        dataProvider: {
          handle: 'li-oembed-twitter-lang',
          type: 'labelValuePair',
          items: [
            {label: 'English', value: ''},
            {label: 'German', value: 'de'},
            {label: 'French', value: 'fr'}
          ]
        }
      }
    }
  ],
  prepareRequest(queryParams) {
    return {
      url: 'https://publish.twitter.com/oembed',
      params: {
        ...this.defaultParams,
        ...queryParams,
        dnt: true
      }
    }
  },
  parseResponse(responseData) {
    return {
      html: `<div class="oembed-wrapper">${responseData.html}</div>`
    }
  }
}
Component
The core Livingdocs oEmbed feature does not include a component, so you will need to create and register your own in your document design.
Careful: You will want to register only one component for all embeds since the li-oembed-service assumes a generic concept. If you for example do a component for tiktok and one for podigee both using the li-oembed-service then users would be able to insert podigee embeds in tiktok components and vice versa. This leads to data inconsitencies.
If you want an embed component for a specific embed like e.g. datawrapper, consider doing an include and providing a custom user interface such as a search modal to serach for datawrapper graphics from inside of Livingdocs.
An example generic oEmbed component can be seen below. The important part is to use the li-oembed-service include service. You can then set your own label and icon, and style the placeholder. When the oEmbed provider returns valid HTML then it will directly replace the inner HTML of the element with the doc-include directive.
// oembed-component.js
module.exports = {
  name: 'oembed-include',
  label: 'Embed',
  iconUrl: `https://livingdocsio.github.io/livingdocs-design-assets/docs/icons/component-icons/icon_component_embed.svg`,
  directives: [
    {
      name: 'oembed-directive',
      type: 'include',
      service: 'li-oembed-service'
    }
  ],
  html: `
    <div doc-include="oembed-directive">
      <div style="
        min-height: 200px;
        background-image: url('https://livingdocsio.github.io/livingdocs-design-assets/docs/icons/component-icons/icon_component_embed.svg');
        background-size: 64px;
        background-color: #f7f7f7;
        background-position: 50% 50%;
        background-repeat: no-repeat;
        opacity: .7;
        box-shadow: 0 1px 2px rgba(0,0,0,.15);
      "></div>
    </div>
  `
}
Facebook and Instagram (Meta)
The company Meta is requiring a review process for all parties that want to embed their content using oEmbed. To get it running with Livingdocs, you will need to do the following:
- We have written a guide below on how to go through these steps. This process can be long. If you cannot complete it, we recommend using HTML embeds (instead of oembeds) for Meta.
- Once you have the permissions, you need to add the appId and secret to Livingdocs as follows:
oembed: {
  credentials: {
    facebook: {
      clientId: 'your-client-id',
      clientSecret: 'your-client-secret'
    }
  },
  allowedCoreProviders: [{
    name: 'li-instagram'
  }, {
    name: 'li-facebook-post'
  }]
}
Step-by-Step Guide to Get the Meta Authorization for oEmbed
Step 1: Set Up a Meta Developer Account and App
- Create a Meta Developer Account:
- Sign up at Meta for Developers for a developer account if you don’t already have one.
- Create a New App:
- In the Meta Developer Dashboard, create a new app by selecting “Create App”.
- Fill in the necessary details, such as app name and contact email.
- Link Your App to Your Business Manager Account:
- In your app’s settings under Settings > Basic, link your app to your Business Manager account.
Step 2: Get Business Verification
- Prepare Your Business Manager Account:
- Make sure your Business Manager account is set up with all required business details (legal name, address, etc.).
- Submit for Business Verification:
- In the Business Manager, navigate to the Security Center and start the verification process by providing the necessary documentation.
- Await Approval:
- Wait for Meta to verify your business. This step can take some time, so it’s best to complete this early in the process.
Step 3: Configure oEmbed Permissions
- Add Product: oEmbed:
- In the app dashboard, add the oEmbed product.
- Request the Required Permissions:
- Once your business is verified, go to the App Review section and request the
oembed_readpermission.
- Once your business is verified, go to the App Review section and request the
Step 4: App Review and Making the App Live
Prepare for App Review:
- With your business verified, submit your app for Meta’s review, focusing on how it uses oEmbed.
Submit and Monitor Review:
- Submit the app for review and await feedback or approval.
Make the App Live:
- After approval, switch your app to live mode to enable oEmbed functionality.
Note: When taking your app live, you are also required to complete the Data Use Checkup form to confirm your compliance with Meta’s data usage policies. You can find more information about the Data Use Checkup process here.
Step 5: Testing and Implementation
- Generate an Access Token:
- Use the following
curlcommand to generate an access token for your app:curl --location 'https://graph.facebook.com/oauth/access_token?client_id=YOUR_APP_ID&client_secret=YOUR_APP_SECRET&grant_type=client_credentials' - Replace
YOUR_APP_IDandYOUR_APP_SECRETwith your actual app credentials. - This command will return an access token that you can use to make API requests.
- Use the following
- Test Instagram oEmbed:
- With the access token, test the oEmbed functionality by fetching an Instagram post:
curl --location 'https://graph.facebook.com/v14.0/instagram_oembed?url=https%3A%2F%2Fwww.instagram.com%2Fp%2FEXAMPLE_POST%2F&access_token=YOUR_ACCESS_TOKEN - Replace
EXAMPLE_POSTwith the URL of an actual Instagram post andYOUR_ACCESS_TOKENwith the token obtained earlier.
- With the access token, test the oEmbed functionality by fetching an Instagram post:
- Test Facebook oEmbed:
- Similarly, you can test Facebook oEmbed by fetching a Facebook post:
curl --location 'https://graph.facebook.com/v14.0/oembed_post?url=https%3A%2F%2Fwww.facebook.com%2FEXAMPLE_POST%2F&access_token=YOUR_ACCESS_TOKEN' - Replace
EXAMPLE_POSTwith the URL of an actual Facebook post andYOUR_ACCESS_TOKENwith the generated token.
- Similarly, you can test Facebook oEmbed by fetching a Facebook post:
- Deploy and Monitor:
- Once testing in live mode is successful, deploy the oEmbed functionality to your production environment.