With Media Sources you can integrate asset research/import into Livingdocs. Instead of having to log in to another platform like Unsplash and then drag + drop images into Livingdocs, you can have Unsplash assets search results available directly in Livingdocs.
If you have integrated a Media Source properly, the Livingdocs editor also shows the search results of the Media Source which can be added to the document like any other asset via drag+drop.
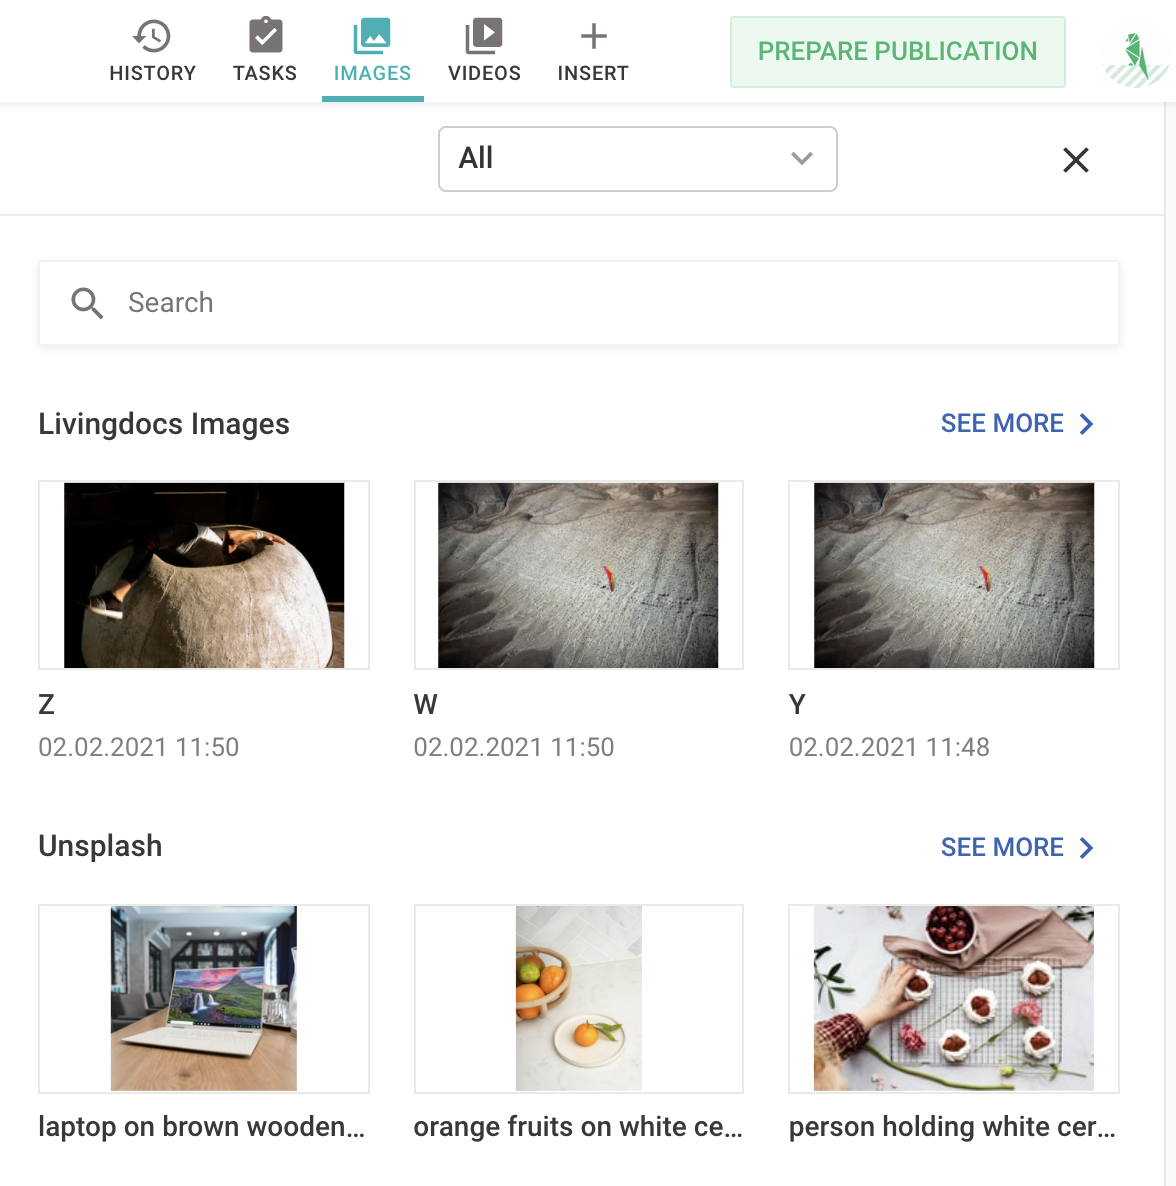
Example
To integrate a Media Source into Livingdocs you have to do 3 things:
- write a media source plugin (search/import function)
- register the plugin
- configure the Media Source on a Media Type in the project config.
Step 1 - Write a Media Source Plugin
First you have to implement a Media Source plugin which has 3 properties:
handle- unique identifier which will be referenced later in the configsearchMediaImage- middleware to request the asset provider and transform the resultset into a Livingdocs formatfetchMediaImage- middleware to fetch the asset
// plugins/media-sources/example_plugin
module.exports = {
  handle: 'examplePlugin',

  // Implement a search result for the Livingdocs Editor from an asset provider
  // based on a search query
  async searchMediaImage({projectId, query, offset, limit, config, log}) {
    const res = await axios.get(myImageServiceUrl)

    // {
    //   totalResults: 100,
    //   entries: [
    //     {id: 1, title: 'title-1', width: 1024, height: 768},
    //     {id: 2, title: 'title-2', width: 1024, height: 768},
    //     {id: 3, title: 'title-3', width: 1024, height: 768}
    //   ]
    // }
    const data = res.data

    const results = data.entries.map((result) => {
      return {
        metadata: {
          title: result.title
        },
        asset: {
          key: result.id,
          width: result.width,
          height: result.height,
          // when the remote service supports image resizing, pass '{{width}}' as search parameter
          // the editor will replace {{width}} and the image can then requested in the right size
          previewUrl: `https://li-test.ch/${result.id}.png?w={{width}}`
        },
        // If systemName and externalId are returned for search results,
        // Livingdocs stores them on the media library entry of inserted items.
        // When the same item is imported again, Livingdocs reuses the existing
        // media library entry instead of creating a duplicate.
        systemName: 'exampleSource', // Added in: release-2026-03
        externalId: result.id // Added in: release-2026-03
      }
    })

    return {
      total: data.totalResults,
      results
    }
  },

  // When you want to drag+drop an asset from a MediaSource search result into a document
  // you must also define a fetch function to import the asset into the Media Library
  async fetchMediaImage({projectId, key, config, log}) {
    // fetch image from remote service
    const fetchUrl = `https://your-source.com/${key}`
    const res = await axios.get(fetchUrl, {
      responseType: 'arraybuffer',
      validateStatus: null
    })
    const buffer = Buffer.from(res.data)

    return {
      fileName: key,
      buffer
    }
  }
}
Step 2 - Register the Media Source Plugin
// app/server.js
liServer.registerInitializedHook(() => {
  liServer.registerMediaSources([require('./plugins/media-sources/example_plugin')])
})
Step 3 - Configure the Media Source
As a last step, a Media Source needs to be added to a Media Type in the project config. It’s important that the plugin property of the Media Source config matches the handle of the plugin. The media source config also has a config property which will be passed to the plugin on runtime.
// mediaTypes in project config
modules.exports = {
  type: 'mediaImage',
  handle: 'image',
  info: {
    label: 'Image',
    description: 'Media type for images'
  }
  metadata: [...],
  // add a media source here
  mediaSources: [
    {
      handle: 'example',
      // the plugin name must match with the registered plugin(-handle)
      plugin: 'examplePlugin',
      info: {
        // this label is shown in the editor
        label: 'Example'
      },
      // config will be passed to the plugin
     config: {
       accessKey: '****'
     }
    }
  ],
}